Appearance
Basic Usage
Navigation
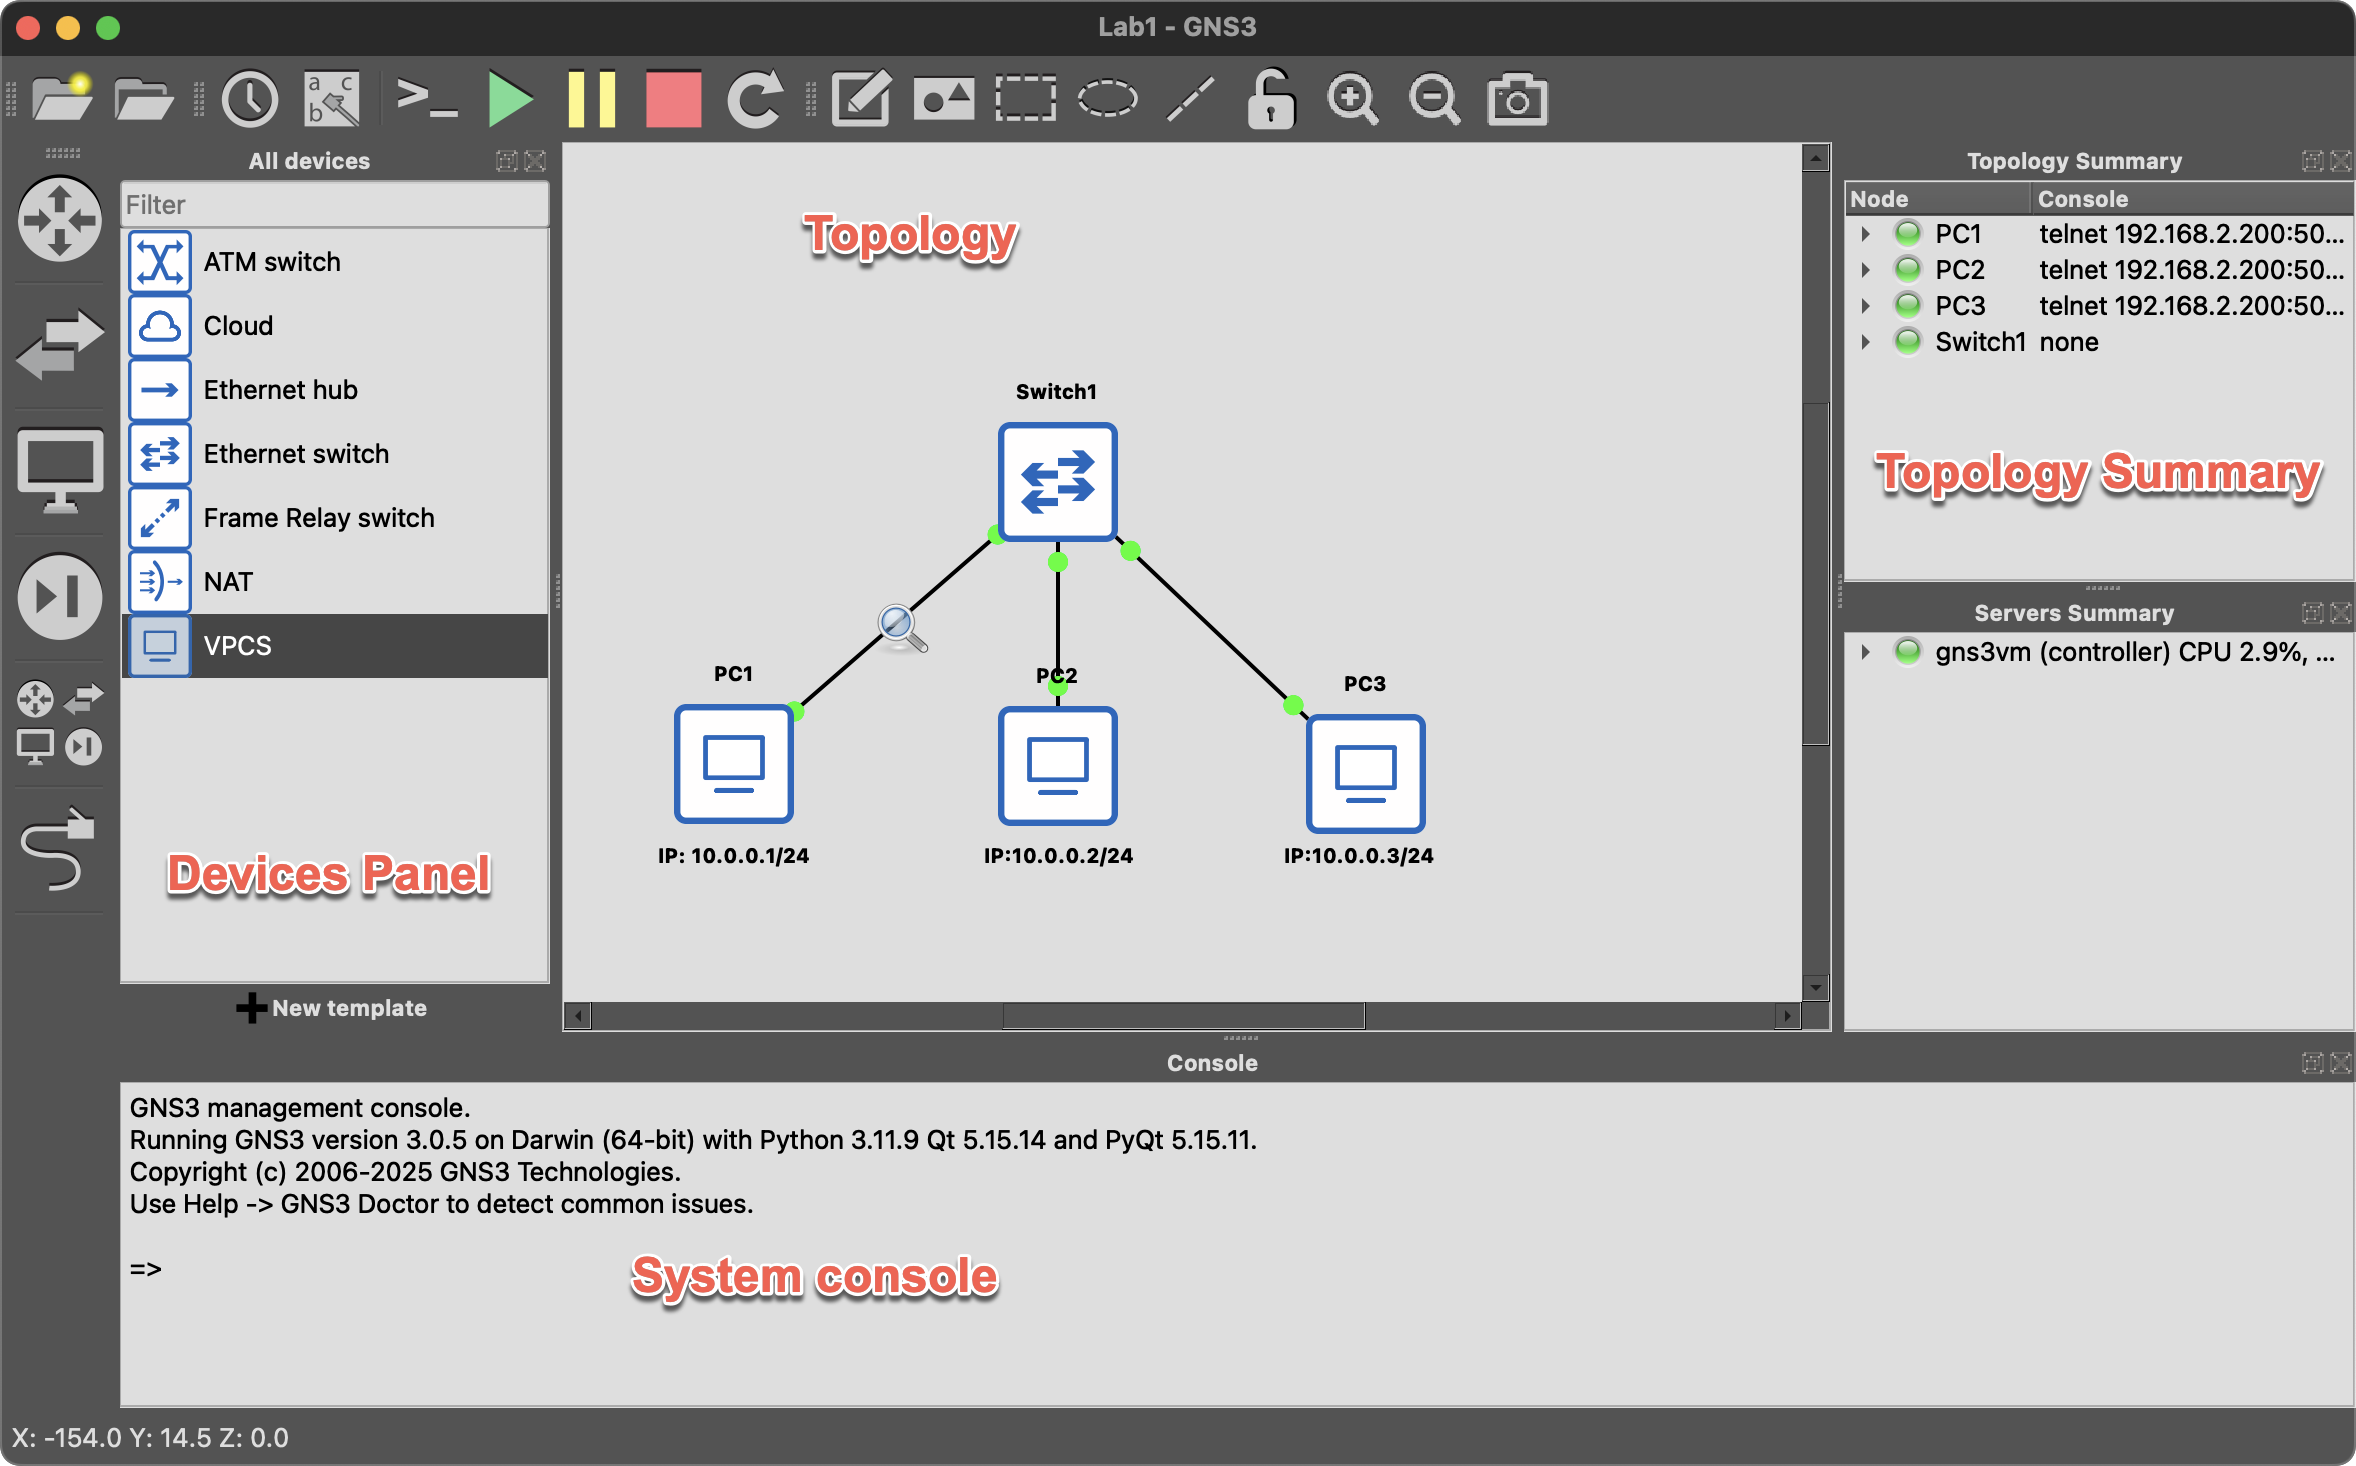
Interface Overview
The GNS3 main interface is divided into several areas:
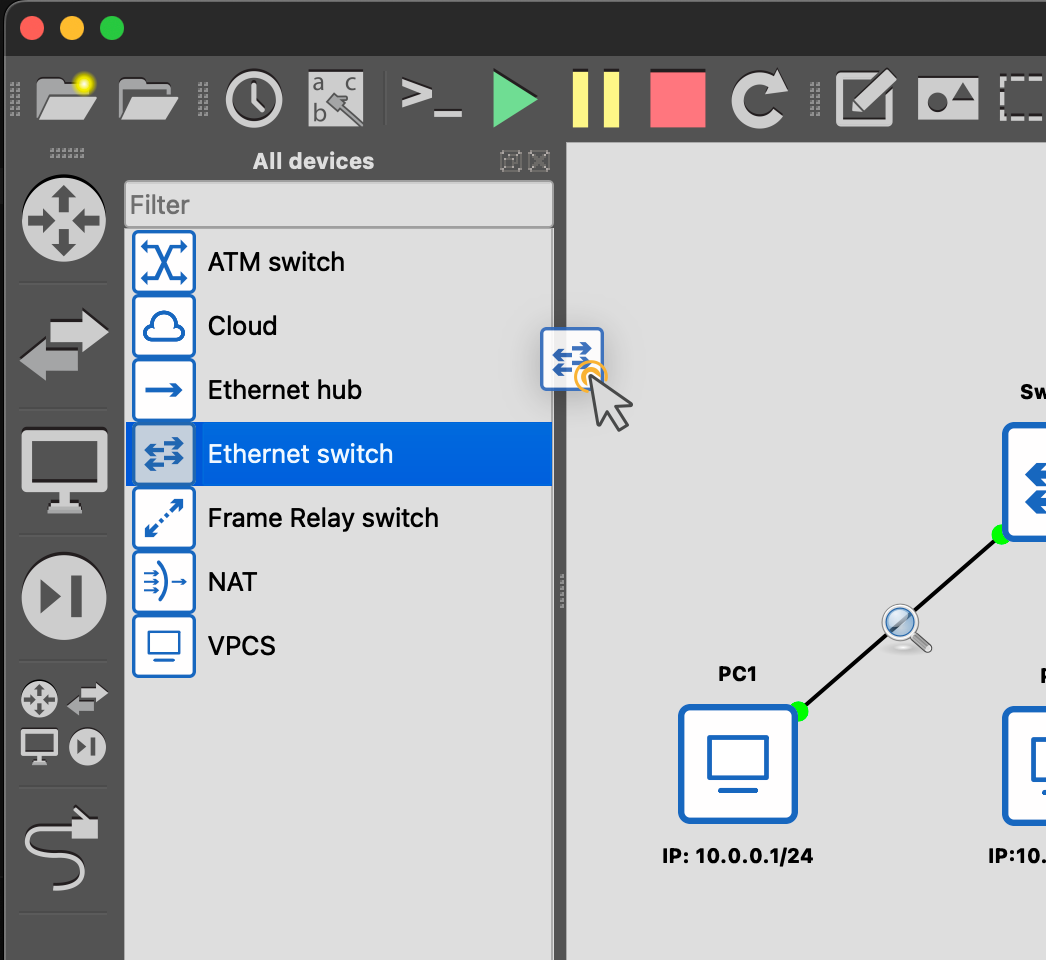
Adding Devices by Drag and Drop
- Select a device type from the Devices Panel on the left
- Drag and drop it to the Workspace
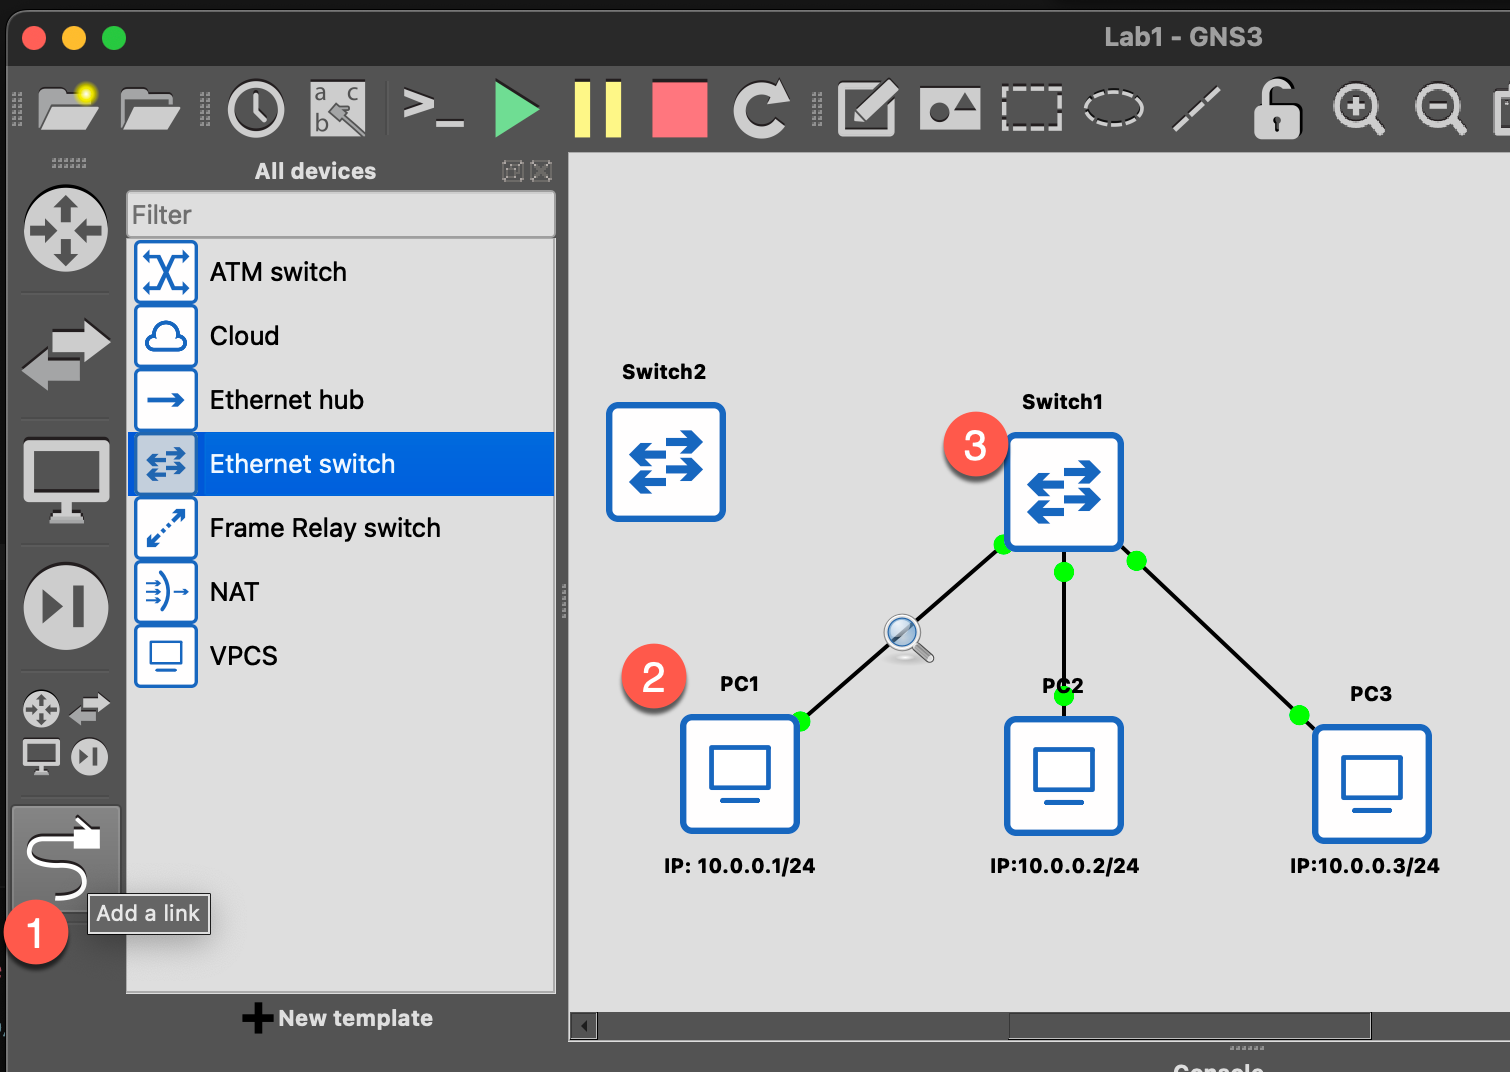
Connecting Devices
- Click the Add a link button in the toolbar (or press
L) - Click on the first device's interface
- Click on the second device's interface
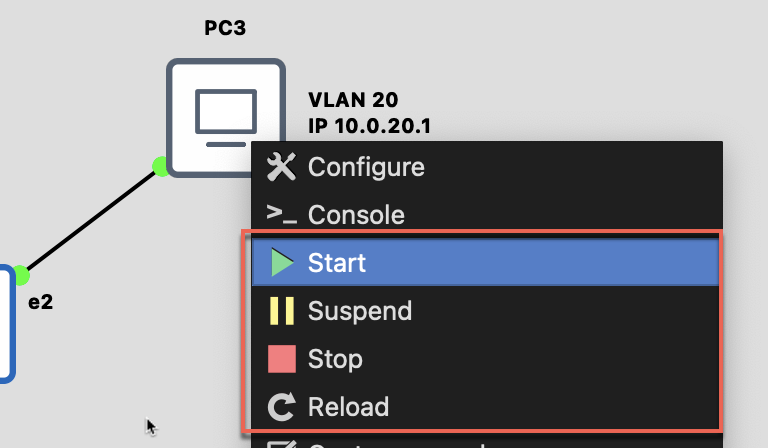
Starting and Stopping Devices
Single Device
- Right-click device → Start / Stop
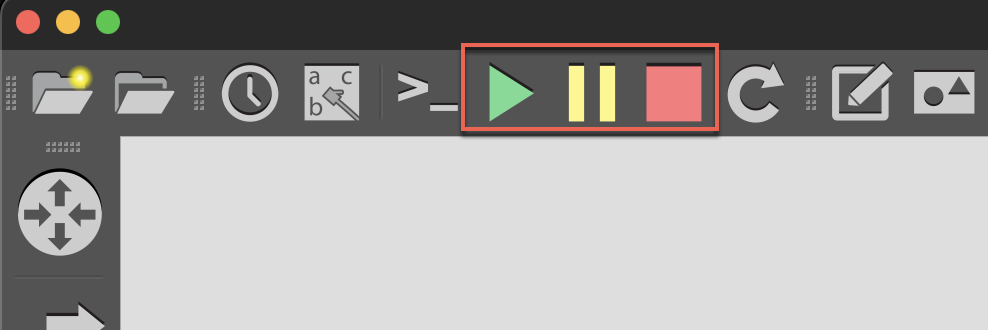
All Devices
- Toolbar → ▶️ Start all / ⏹️ Stop all
Console Connection
Method 1: Right-click
Right-click device → Console
Method 2: Double-click
Double-click directly on the device icon

Configure Console Application
- Windows
Edit → Preferences → General → Console applications- MacOS
GNS3 → Preferences → General → Console applicationsPacket Capture
GNS3 has built-in Wireshark integration for packet analysis. Right-click on any link → Select "Start Capture" 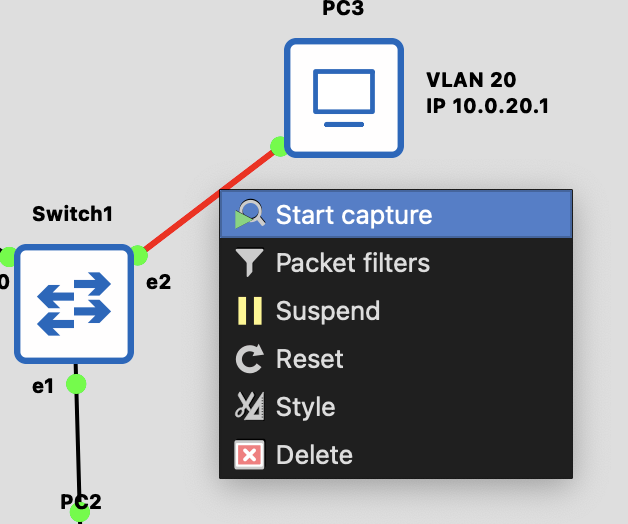
Check "Start the Capture Visualization Program" to launch Wireshark 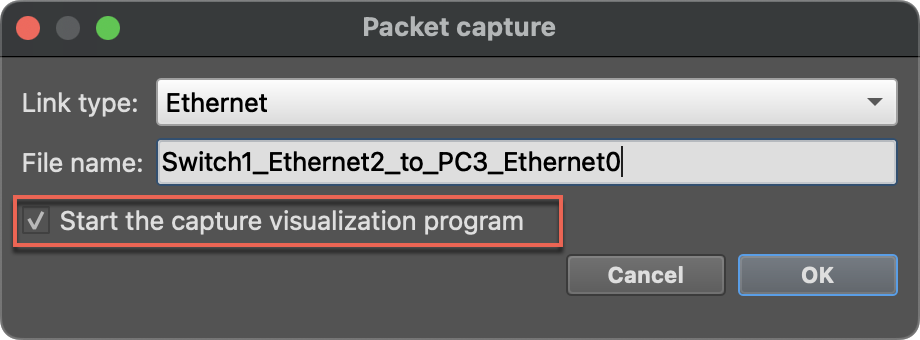
Wireshark opens automatically 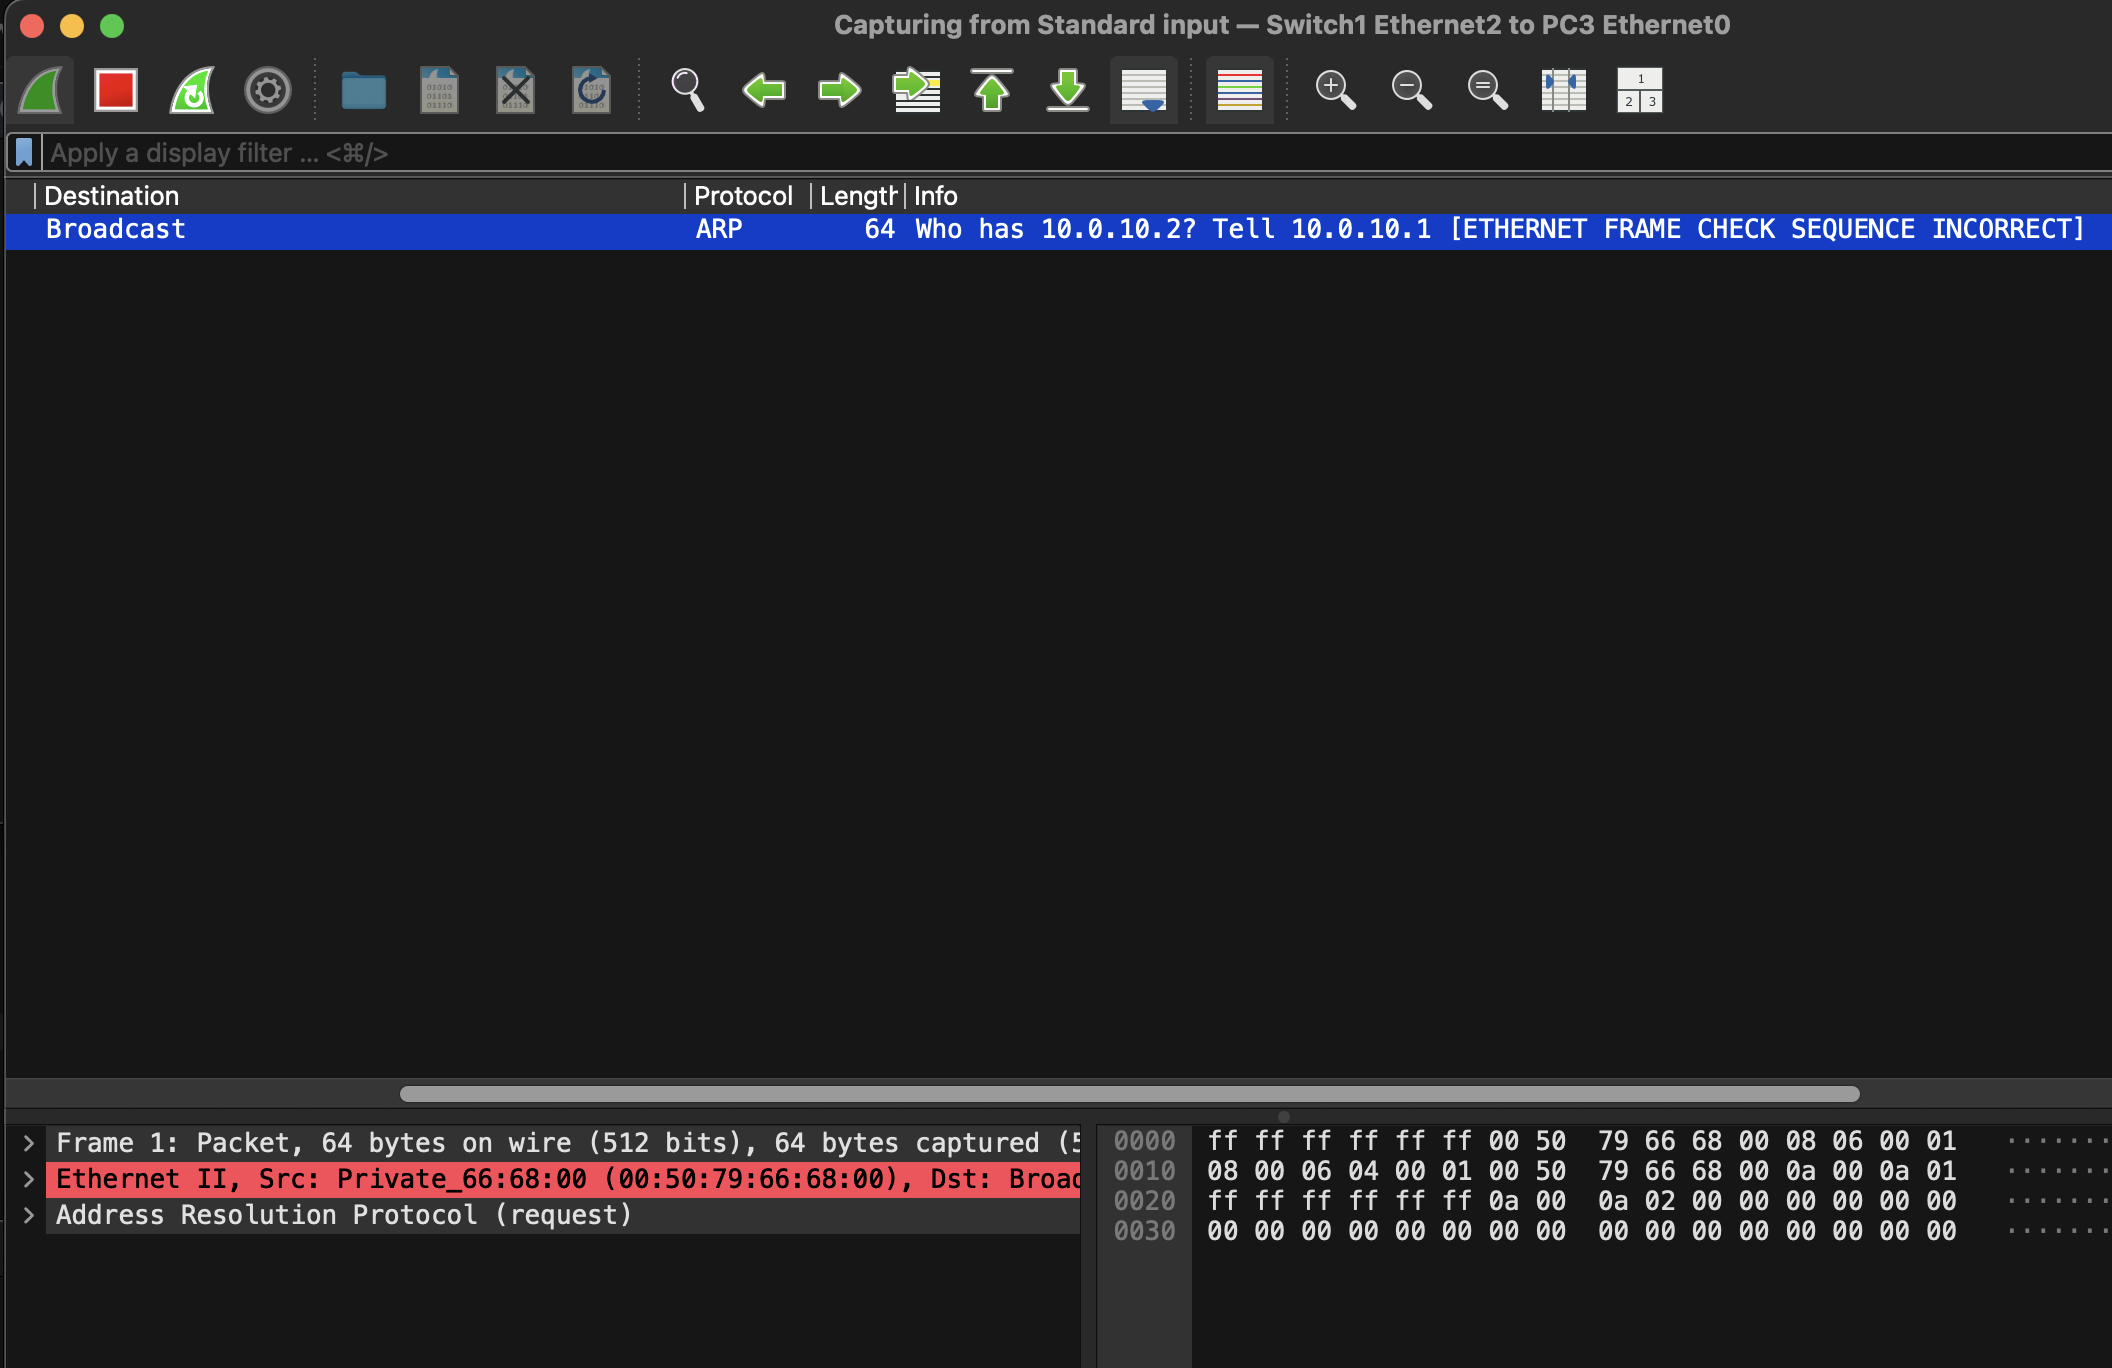
Save Project
File → Save project as...Project file structure:
my-project/
├── my-project.gns3      # Project configuration file
└── project-files/
    ├── qemu/            # QEMU VM files
    └── docker/          # Docker configuration
Export/Import
Export Project (including images)
File → Export projectImport Project
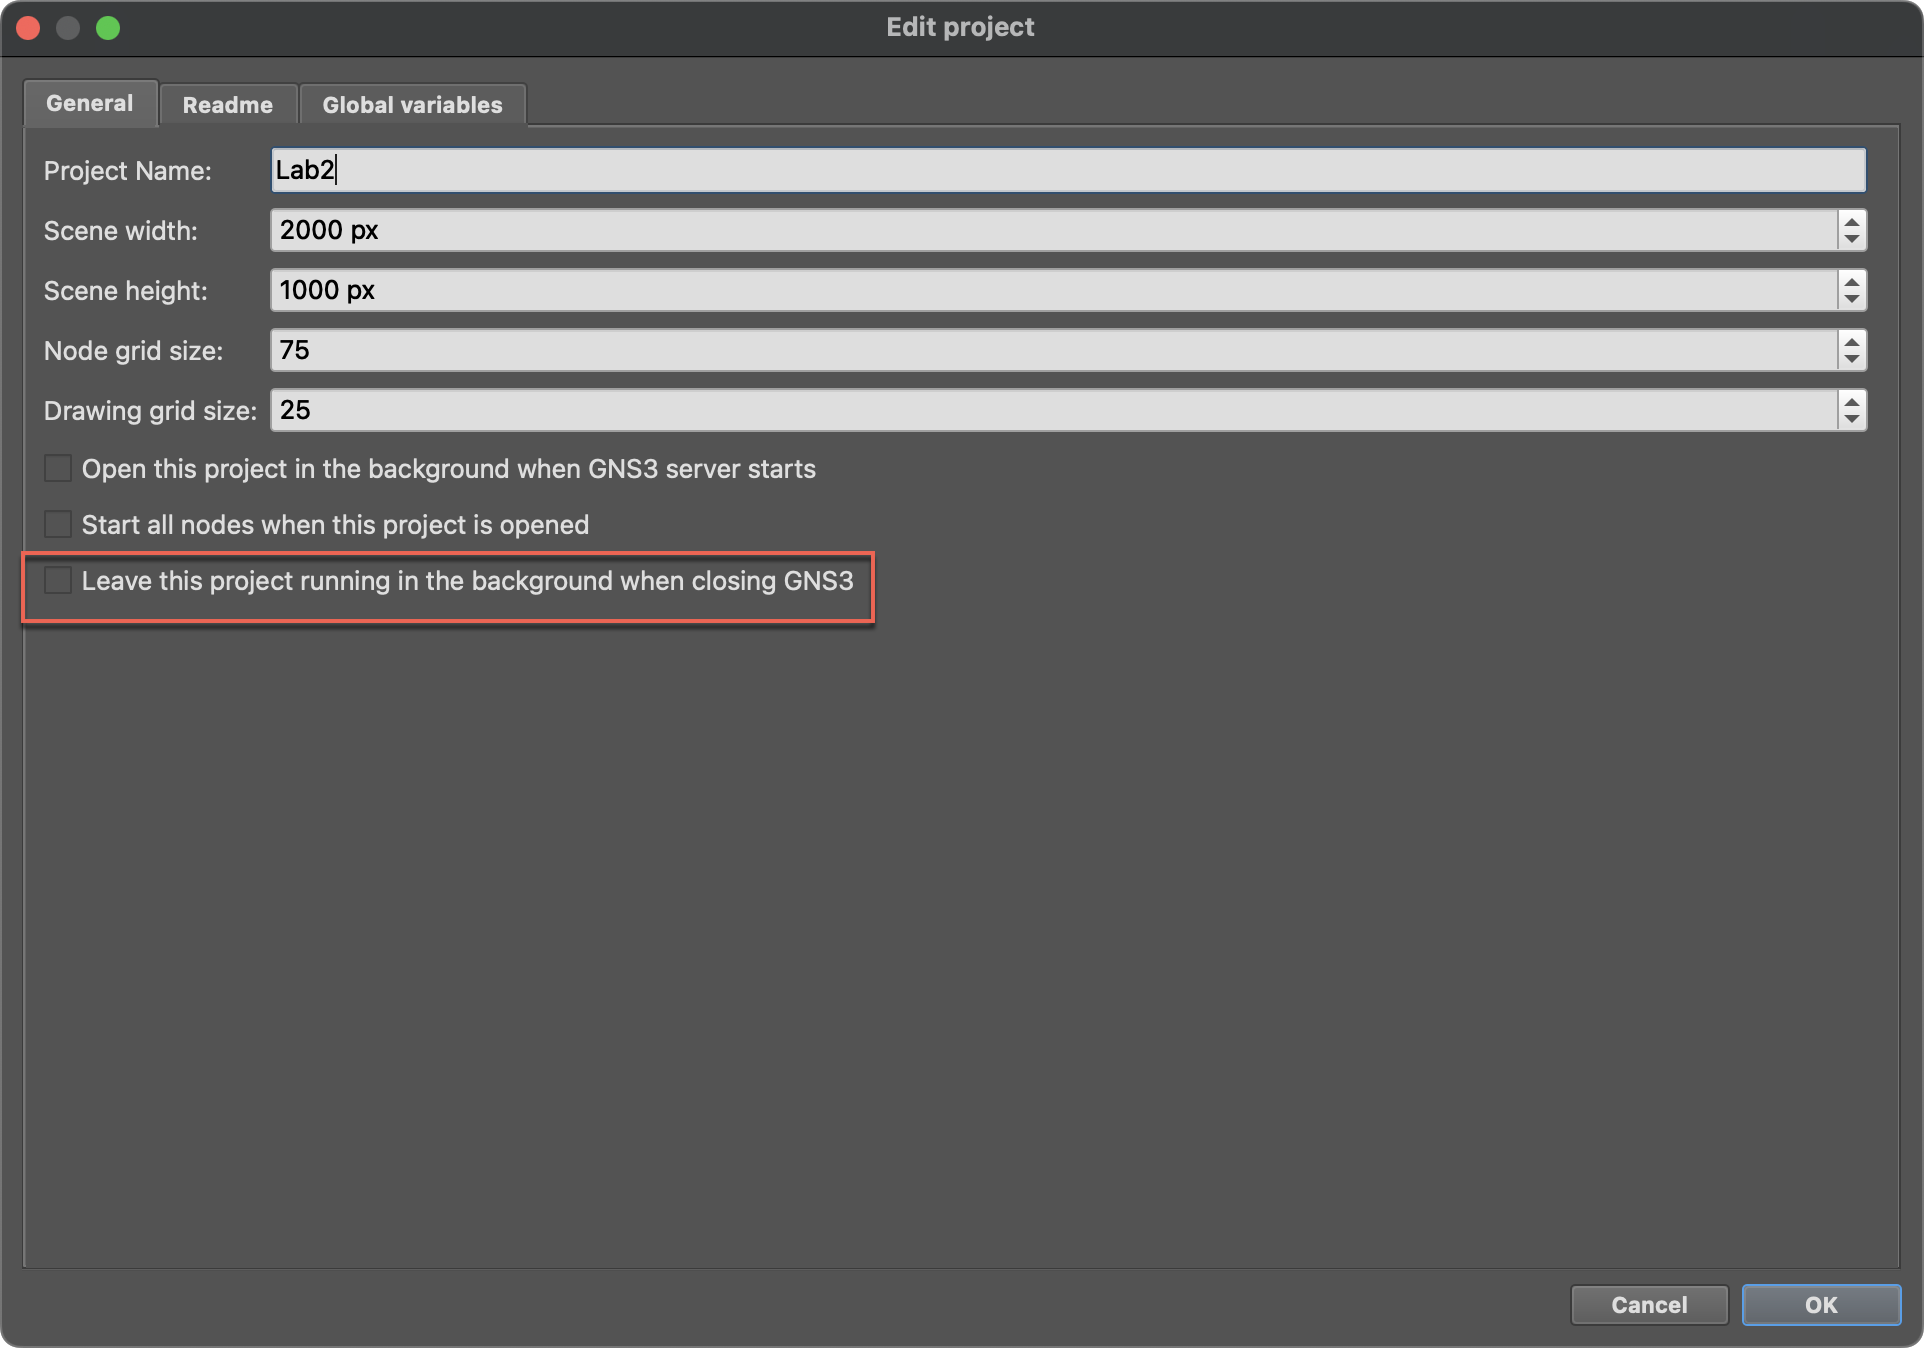
File → Import projectKeep Project running when closing GNS3
- In GNS3
File→Edit project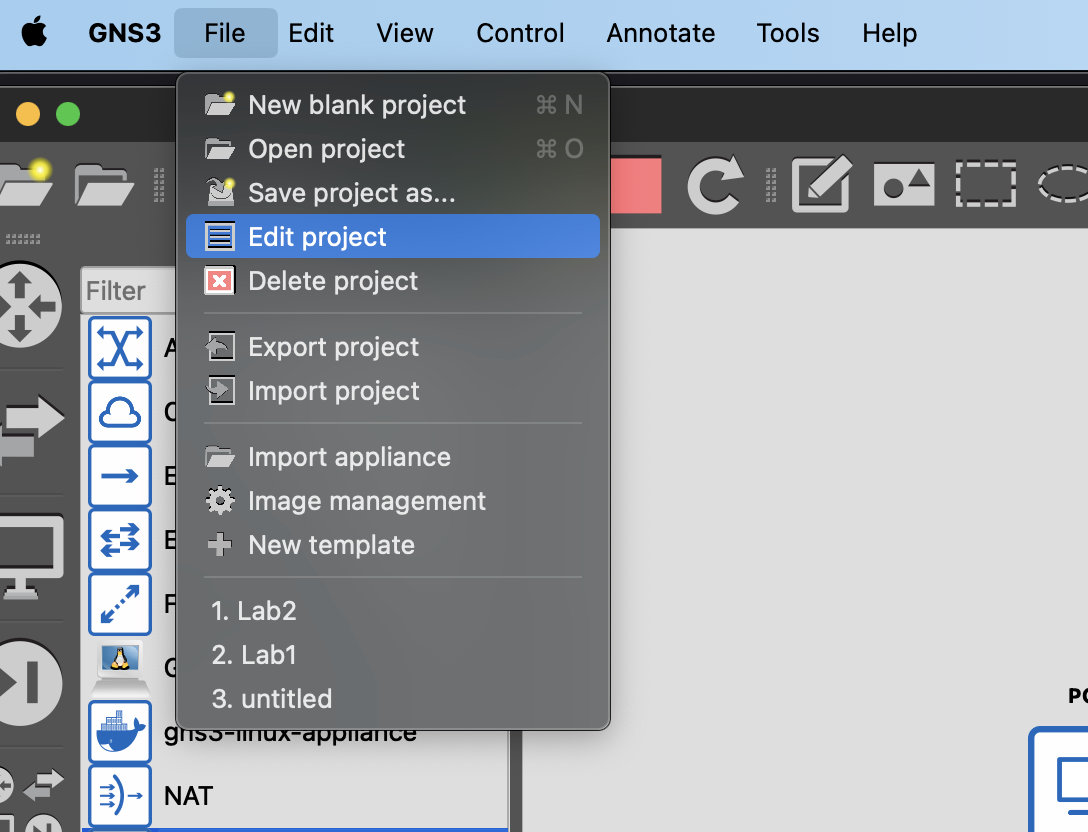
- Check
Leave this project running in background when closing GNS3