Appearance
Creating GNS3 Docker Appliances
This guide demonstrates how to create a lightweight Linux network appliance based on Alpine Linux 3.19, with support for VLAN, Bridge, and IP forwarding.
Features
- Serial Console
- VLAN 802.1Q support
- Bridge support
- IP forwarding (IPv4/IPv6) enabled by default
- Essential network tools included
Included Network Tools
ip(iproute2) - Network configurationbrctl(bridge-utils) - Bridge managementtcpdump- Packet capture and analysisiptables- Firewall and NATdhclient- DHCP clientbash- Full bash shell
Prerequisites
- GNS3 VM or GNS3 server with Docker support
- Docker installed (if building locally)
- Dockerfile from this repository
Download Files
You can download the following files to use this appliance:
- 📥 Download Dockerfile - For building your own Docker image
- 📥 Download gns3-linux-appliance.tar - Pre-built Docker image (ready to import)
- 📥 Download gns3-linux-appliance.gns3a - GNS3 appliance configuration file
Build and Installation
Method 1: Build directly on GNS3 VM
This method builds the image directly on your GNS3 VM:
bash
# SSH into GNS3 VM
ssh gns3@<gns3-vm-ip>

# Create directory and copy Dockerfile
mkdir -p ~/gns3-linux-appliance
cd ~/gns3-linux-appliance

# Copy Dockerfile to this directory (use scp or paste content)
# Then build the Docker image
docker build -t gns3-linux-appliance:latest .
Method 2: Build locally and import
This method is useful if you want to build on your local machine and then import:
bash
# Build image locally
docker build -t gns3-linux-appliance:latest .

# Export as tar file
docker save gns3-linux-appliance:latest > gns3-linux-appliance.tar

# Copy to GNS3 VM
scp gns3-linux-appliance.tar gns3@<gns3-vm-ip>:~/

# SSH into GNS3 VM and load the image
ssh gns3@<gns3-vm-ip>
docker load < gns3-linux-appliance.tar
Method 3: Use Pre-built Docker Image
If you don't want to build it yourself, you can directly download and import the pre-built Docker image:
bash
# After downloading gns3-linux-appliance.tar, copy it to GNS3 VM
scp gns3-linux-appliance.tar gns3@<gns3-vm-ip>:~/

# SSH into GNS3 VM
ssh gns3@<gns3-vm-ip>

# Load the pre-built image directly
docker load < gns3-linux-appliance.tar
Verify Installation
bash
# Check if image is loaded
docker images | grep gns3-linux-appliance
You should see output similar to:
gns3-linux-appliance latest xxxxxxxxxx xxx days ago xxx MBUsing in GNS3
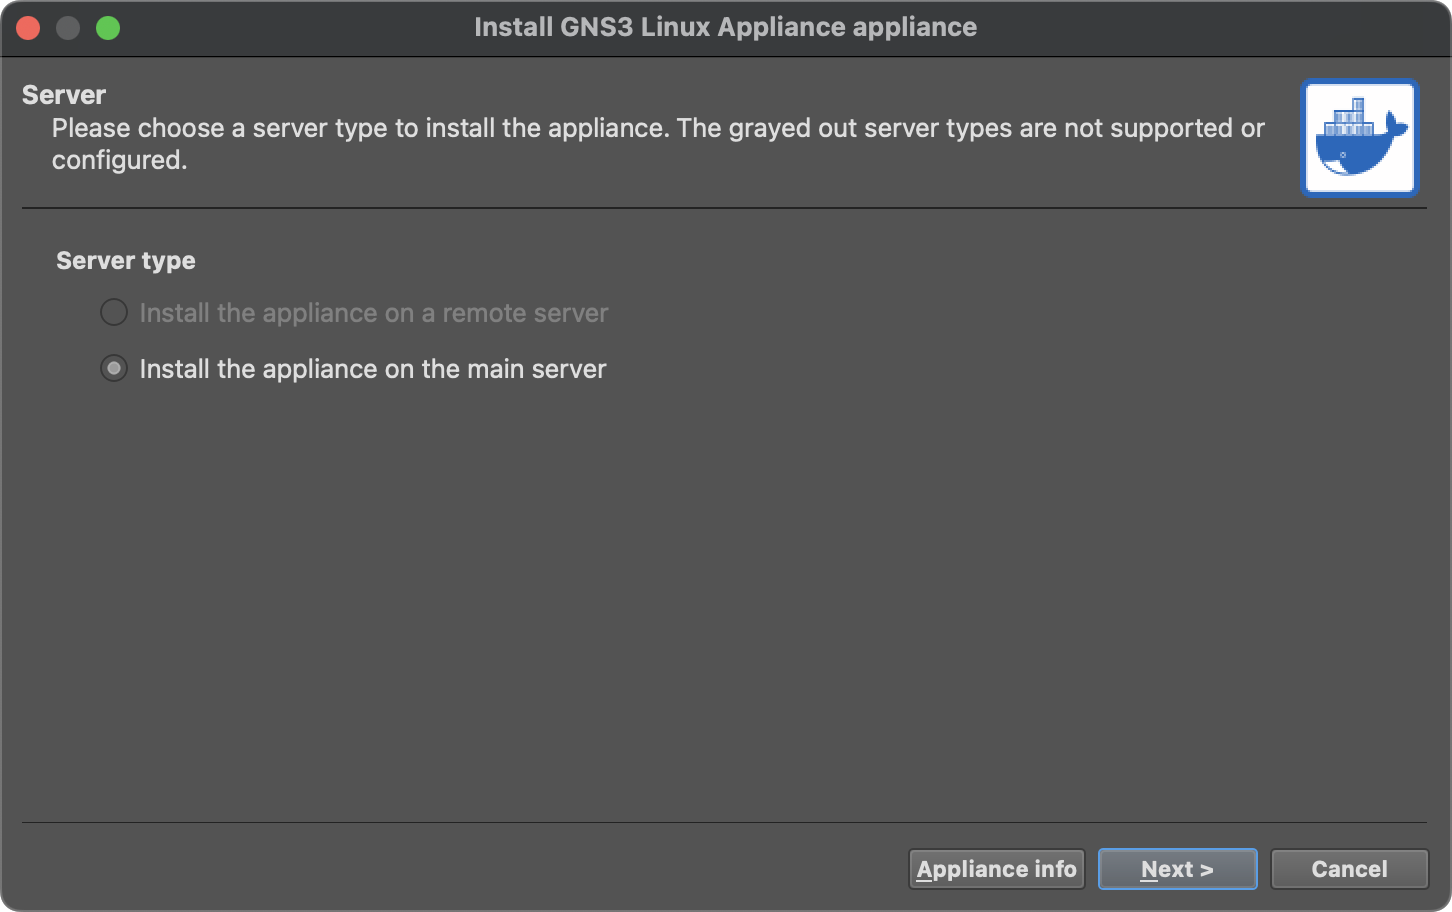
Method 1: Using .gns3a file
- In GNS3, click
New Templateon device panel and selectImport an appliance file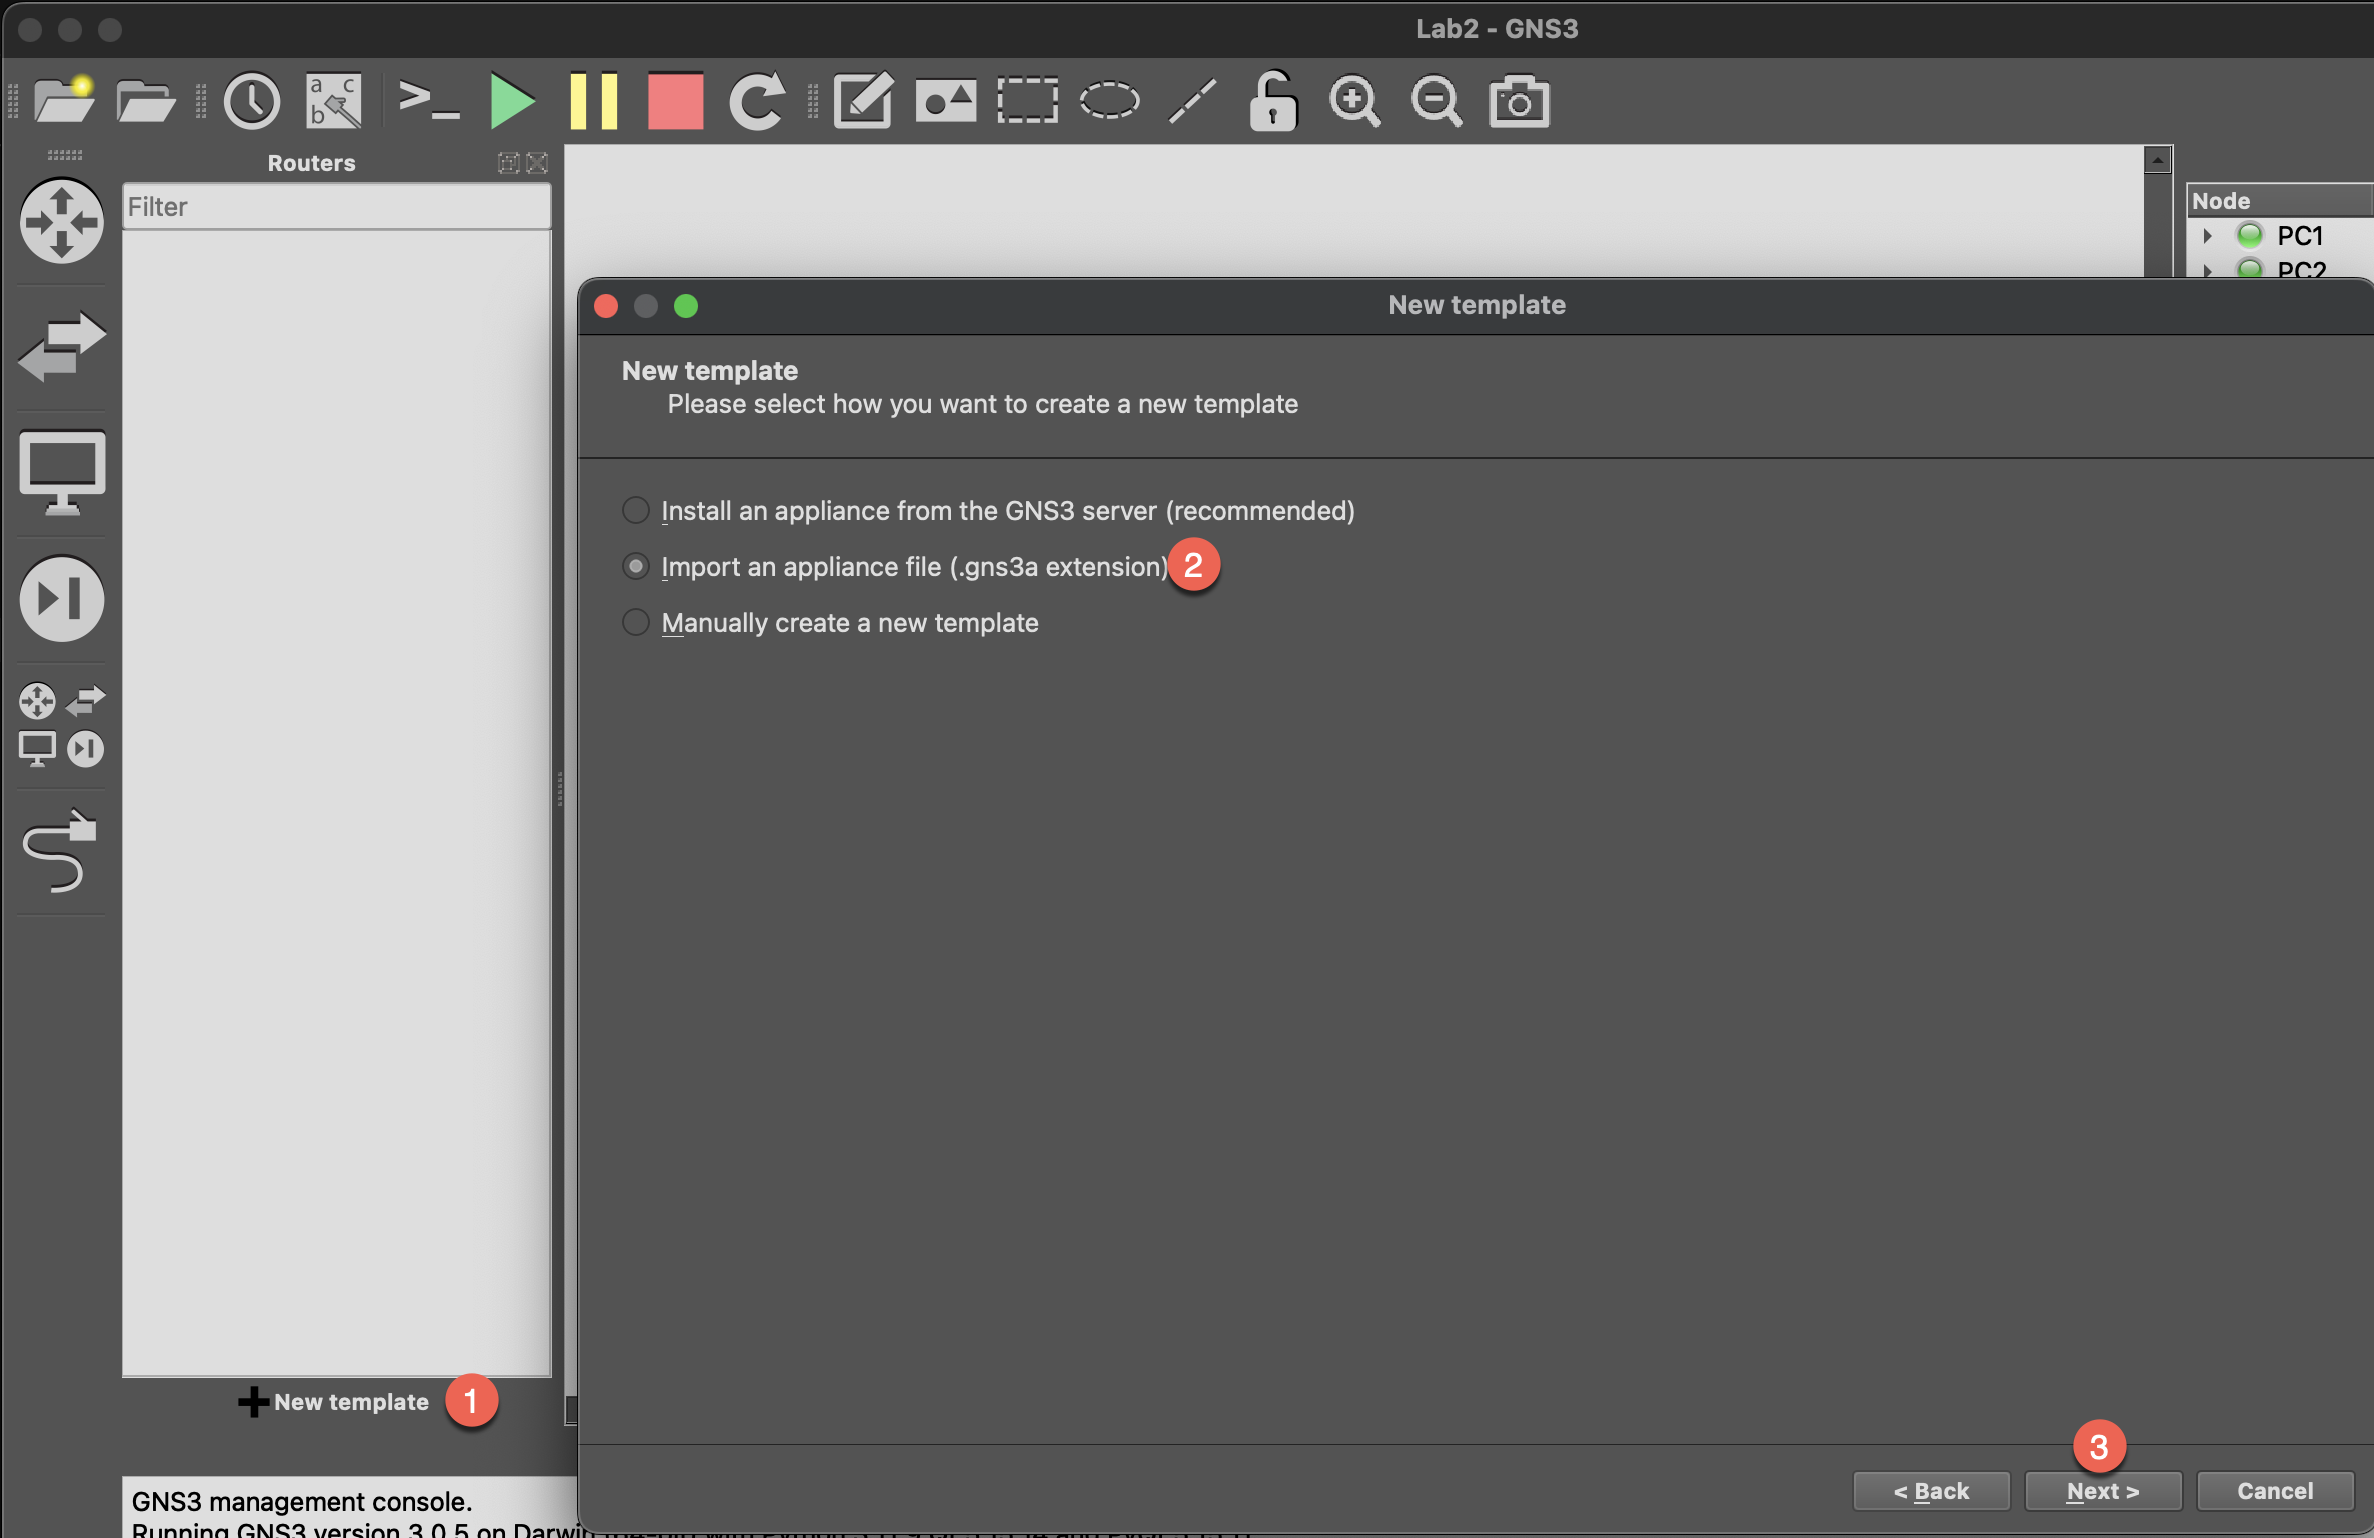
- Select the
gns3-linux-appliance.gns3afile - Follow the wizard to complete the import
Method 2: Manually add Docker container
- In GNS3, click
New Templateon device panel and selectManually create a new template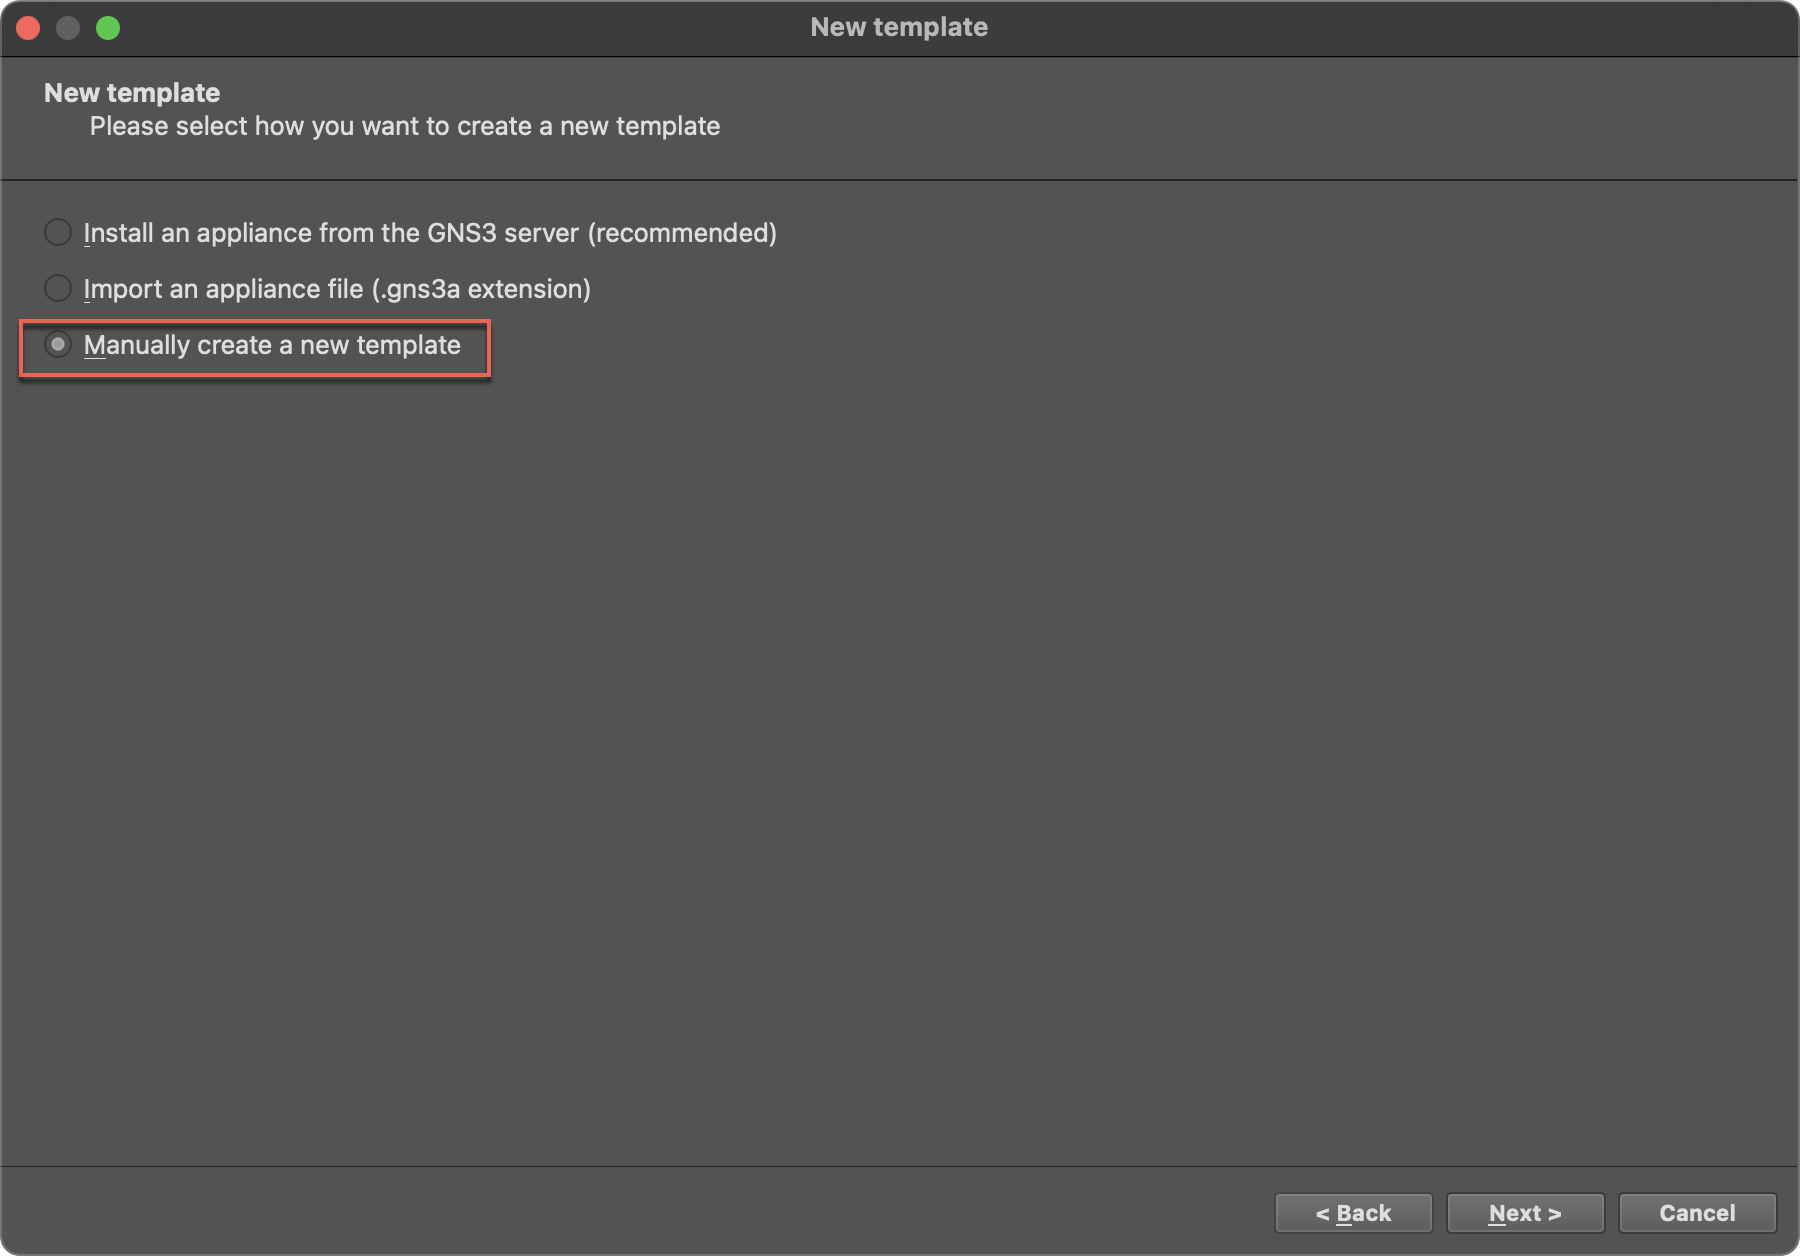
- Preferences Window will popup, select the
Docker→Docker containers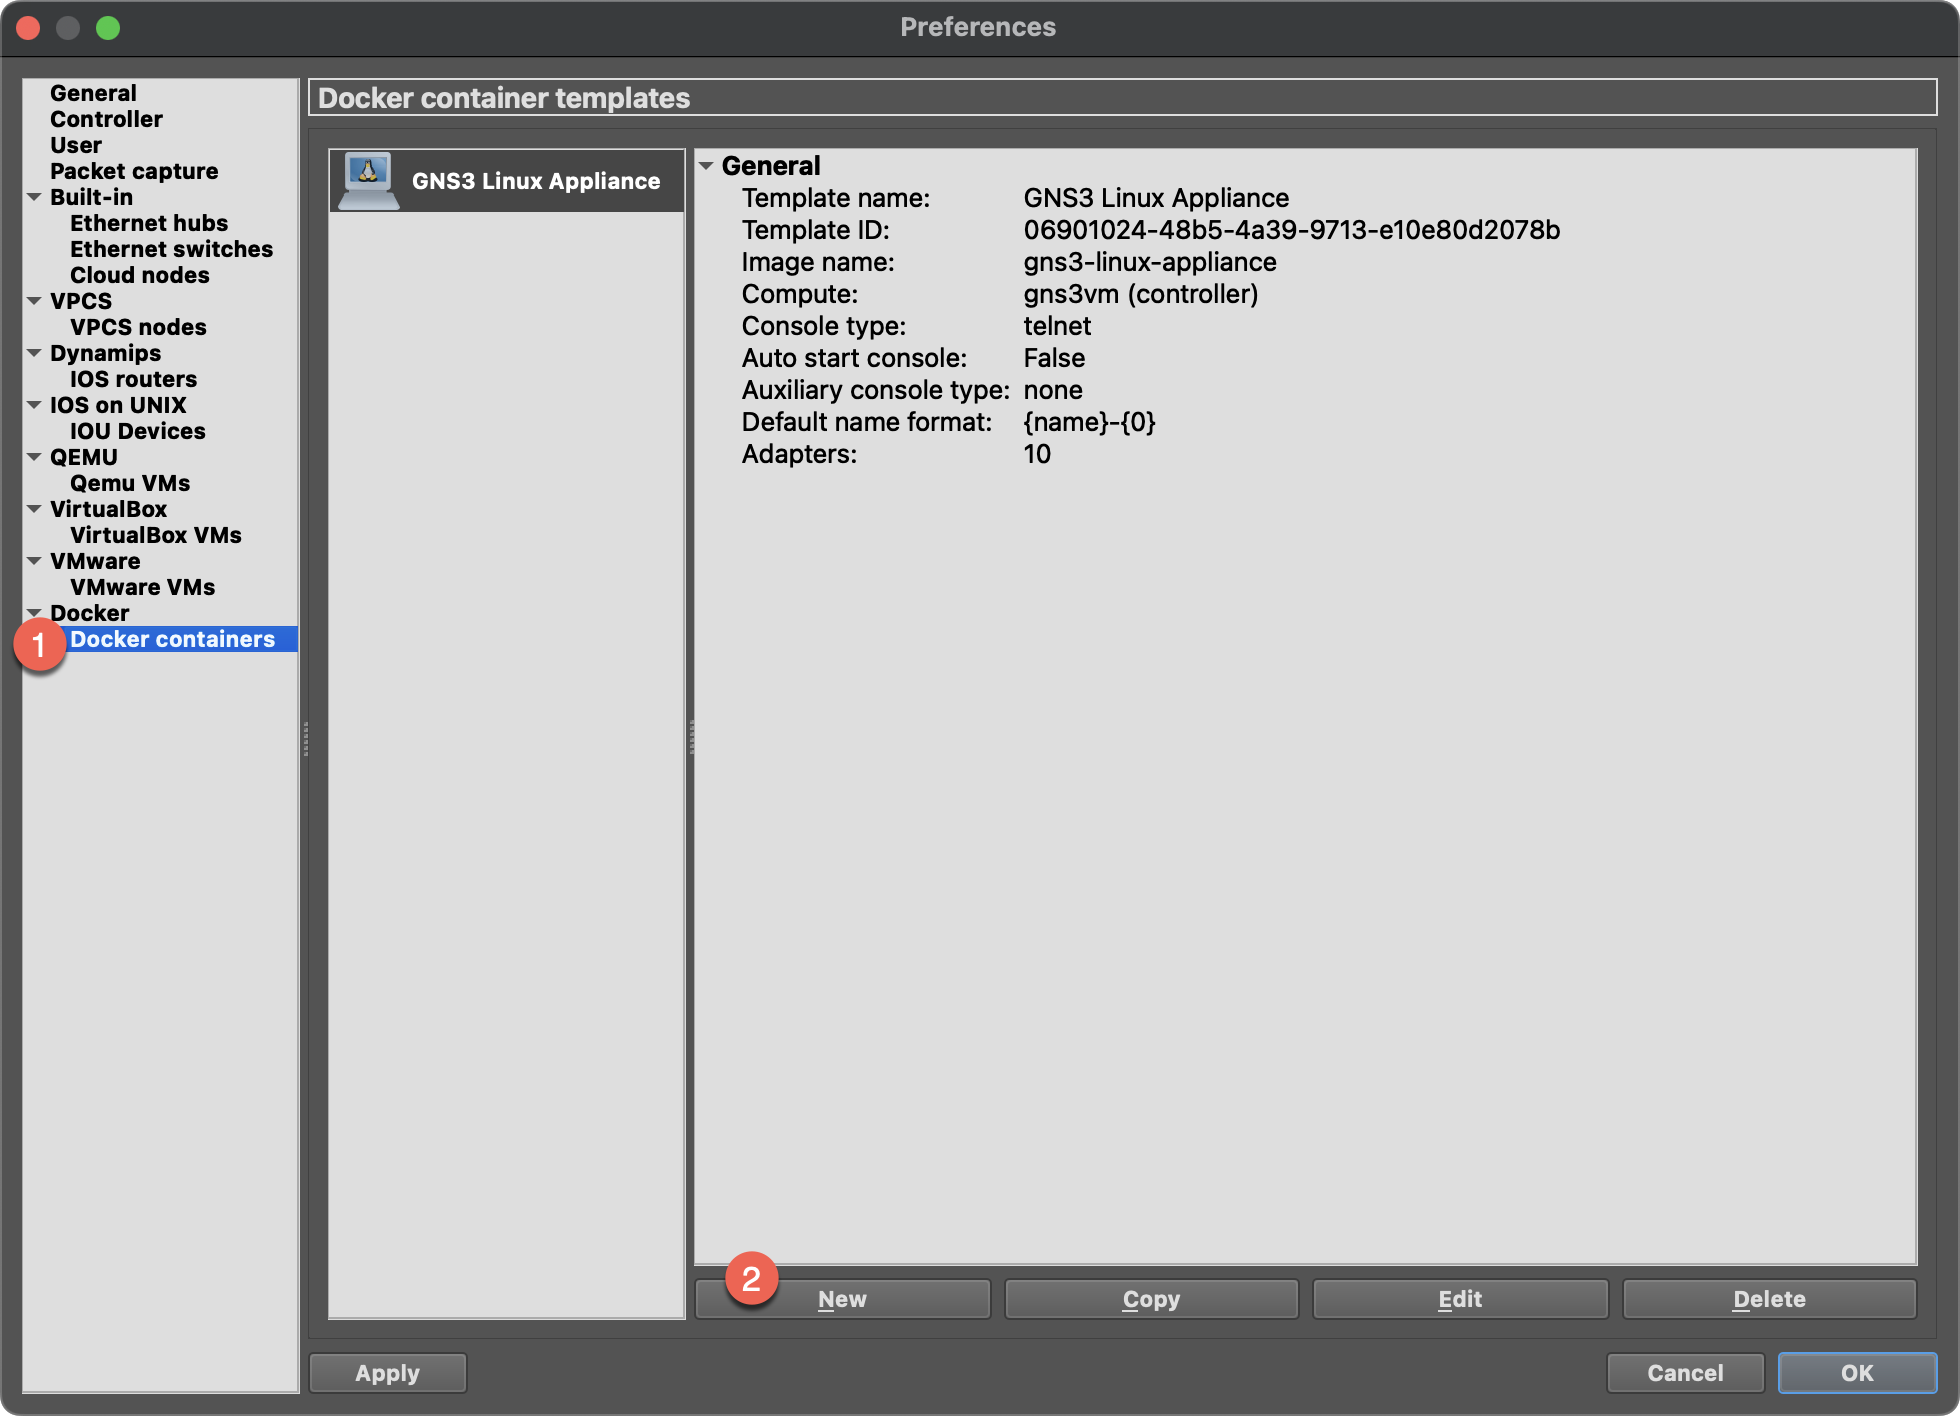
New→ Selectgns3-linux-appliance:latest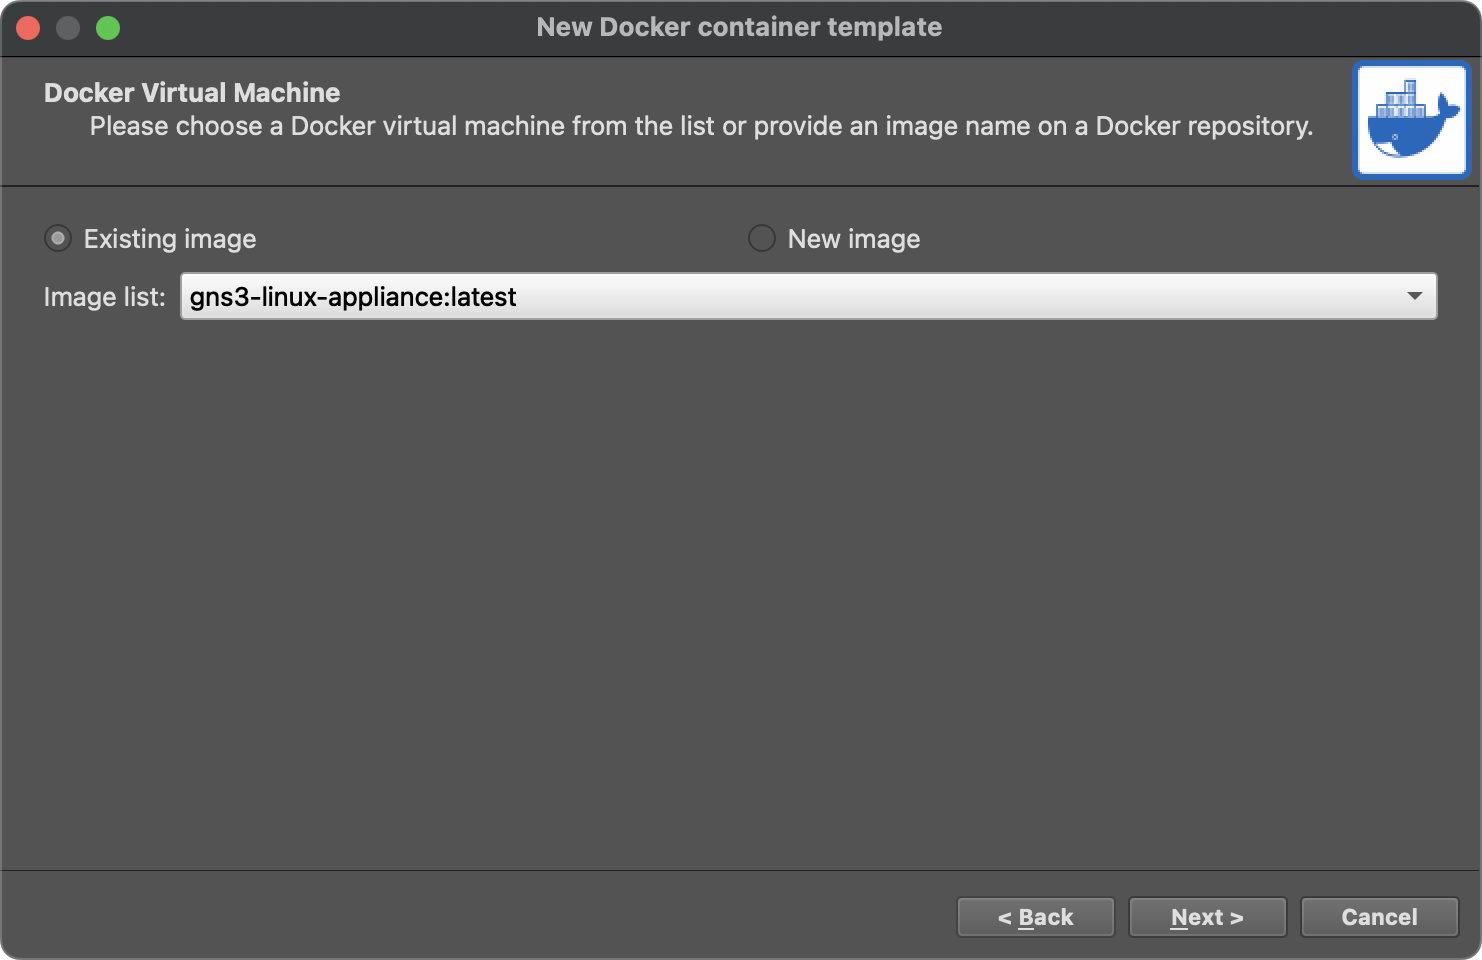
- Configuration:
- Adapters: 10 (or adjust as needed)
- Console type: telnet
- Start command:
/usr/local/bin/startup.sh
Dockerfile Contents
Here's the Dockerfile used to build this appliance:
dockerfile
FROM --platform=linux/amd64 alpine:3.19

LABEL maintainer="GNS3 User"
LABEL description="Lightweight Linux appliance for GNS3 with VLAN and IP forwarding support"

# Install essential network tools
RUN apk add --no-cache \
    bash \
    iproute2 \
    iptables \
    tcpdump \
    dhclient \
    bridge-utils

# Load VLAN module (8021q) at boot
RUN echo "8021q" >> /etc/modules

# Create startup script to enable VLAN and IP forwarding
RUN cat > /usr/local/bin/startup.sh <<'EOF'
#!/bin/bash

# Load VLAN module
modprobe 8021q 2>/dev/null

# Enable IP forwarding
sysctl -w net.ipv4.ip_forward=1 >/dev/null 2>&1
sysctl -w net.ipv6.conf.all.forwarding=1 >/dev/null 2>&1

# Bring up all network interfaces
for iface in /sys/class/net/*; do
    ifname=$(basename $iface)
    if [ "$ifname" != "lo" ]; then
        ip link set $ifname up
    fi
done

# Start shell
exec /bin/bash
EOF

RUN chmod +x /usr/local/bin/startup.sh

WORKDIR /root

CMD ["/usr/local/bin/startup.sh"]
Usage
Basic Operations
bash
# Set IP address
ip addr add 192.168.1.10/24 dev eth0
ip link set eth0 up

# Set Gateway
ip route add default via 192.168.1.1

# Get IP via DHCP
dhclient eth0

# View network interfaces
ip addr show

# View routing table
ip route show
VLAN Operations
bash
# Create VLAN interface
ip link add link eth0 name eth0.10 type vlan id 10
ip addr add 192.168.10.1/24 dev eth0.10
ip link set eth0.10 up

# Create multiple VLANs on same interface
ip link add link eth0 name eth0.20 type vlan id 20
ip addr add 192.168.20.1/24 dev eth0.20
ip link set eth0.20 up

# Remove VLAN interface
ip link delete eth0.10
Bridge Operations
bash
# Create bridge and add interfaces
ip link add name br0 type bridge
ip link set br0 up
ip link set eth0 master br0
ip link set eth1 master br0

# Assign IP to bridge
ip addr add 192.168.1.1/24 dev br0

# Remove interface from bridge
ip link set eth0 nomaster

# Delete bridge
ip link delete br0
IP Forwarding (Router Mode)
bash
# IP forwarding is automatically enabled at startup
# Verify status
sysctl net.ipv4.ip_forward
sysctl net.ipv6.conf.all.forwarding

# Configure NAT (example)
iptables -t nat -A POSTROUTING -o eth0 -j MASQUERADE
iptables -A FORWARD -i eth1 -o eth0 -j ACCEPT
iptables -A FORWARD -i eth0 -o eth1 -m state --state RELATED,ESTABLISHED -j ACCEPT
Startup Behavior
The appliance automatically performs the following at startup:
- Load VLAN module: Loads
8021qkernel module for VLAN support - Enable IP forwarding: Enables IPv4 and IPv6 forwarding for routing
- Bring up interfaces: Automatically brings up all network interfaces (except loopback)